Posts

Animation

Image
Here is the link to my final animation! https://youtu.be/nVaTBfV4noo      My final project for this class was to create my very own frame animation. My final animation ended up being a total of 638 frames, 63.8 seconds long, and took me about 15+ hours to complete. I created this project using Adobe Photoshop by converting video clips into layers that converted into a frame animation. I drew on every clip to create a very colorful and fun animation telling the story of a girl going for a walk through visuals. I have always used walking as a source of inspiration and motivation when it comes to stress and schoolwork. In my animation I wanted to portray what it feels like to be stressed or bored, then what it feels like to go on a walk, and how creativity flows better afterward.  This project was one of the most challenging assignments I've ever had but looking back it's cool to see that I was able to create something I never would've thought I could a few months ago.

Audio

Image
      I created the audio for my animation in Garageband. Garageband was a super helpful tool in the process of making my own audio. I knew how I wanted the music and sound for my video to sound in my head before and I was able to bring my video to life in Garageband. My animation is very upbeat and inspiring so I knew I wanted to create that feeling in the sound as well. I started with a happy piano loop and played it from beginning to end. Since the first few seconds the feeling is supposed to be dull and upset before the walking and colors start, I didn't add the fun beat until the colors begin in the second clip. Then at the very end when I am supposed to be feeling inspired and motivated after my walk, I added a fun melody to convey that feeling. Making my own audio was so fun and added so much character to my animation. 

Autoscopy

Image
      The autoscopy project was one that really made me think about how I wanted to portray a deeper meaning through my work. For this project, I created an altered portrait of myself that displayed a certain part of me or portrayed some of my deepest thoughts and dreams. So for my autoscopy, I used a picture of myself and added sheet music over myself in the color pink. I chose this because I have always felt drawn to music and I feel it has a hold a huge place in my heart. I consider music to be a large part of my identity. I then used the color burn effect to create the overlay of music on my face. Lastly is used the style transfer neural filter to create the painted look on my image. I love creating this project and getting to use the different effects of Photoshop. 

Multiplicity

Image
      This project was probably the most fun to create! For this project, I created a scene with six versions of myself in one photo that tells a story.  I created this using Adobe Photoshop and using the select and mask tool. I started with a blank photo of the scene. I then took six separate photos of myself, in the exact same framing, but in different spots and outfits to create the idea of multiple characters in a photo. Then I used the select and mask tool to exactly select just myself out of each photo and place it into the blank scene. The challenge was making sure all the shadows and lighting matched each other to create a seamless illusion of reality.  I loved the final product of this project!

Somewhere

Image
      This project was another one of my favorites! For this project, I chose a still from my favorite movie, Mamma Mia, and photoshopped myself into it. I took a photo of myself posed and dressed correctly to blend into the scene as best as possible. Then I edited my photo to match the lighting and effect of the movie photo. I used the select and mask tool to cut and paste just my body from my photo and place it into the movie photo. I love how this project came out and it was really fun to create!

BW to Color

Image
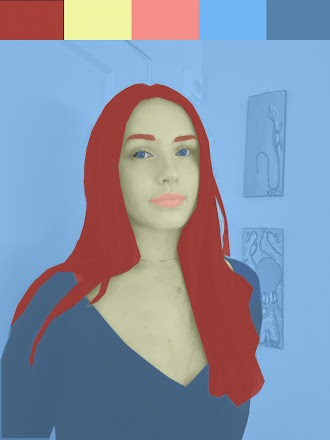
      This project was another challenging one! To create this project I used Adobe Photoshop. I started with a black-and-white photo of myself and then picked out three color palettes using Adobe Color. The three types of palettes I used were triad, complementary, and compound. I then used the select and mask tool to trace specific sections of my portrait and re-color them with colors from my chosen palettes.  I enjoyed this project, even though it was a challenging one since I learned a lot about Photoshop and the different tools.